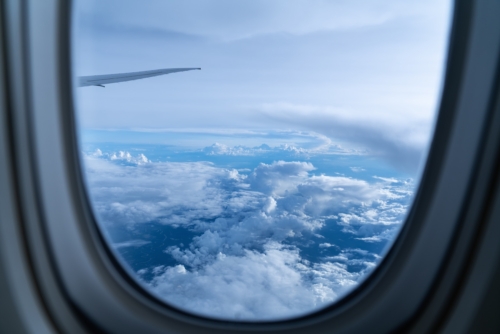
Your first trip outside your home country can be pretty amazing. The thought of finally getting to see a place you’ve only seen on TV or read about in a book is exciting, until you realize all of the things that need to be taken care of to ensure you don’t have any problems on your trip. Planning your trip doesn’t have to be daunting. I’ve compiled this list of tips to help your preparation for international travel be as smooth and easy as possible.
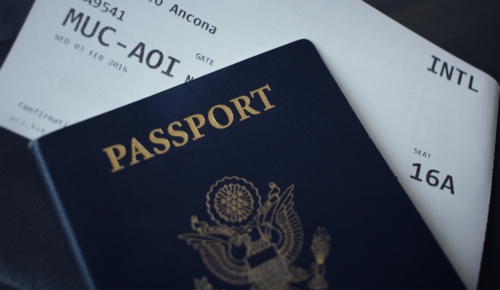
- PASSPORT
Check out my dedicated blog post on getting your passport. Whether it’s your first time or you’re renewing this article will provide all the necessary information.
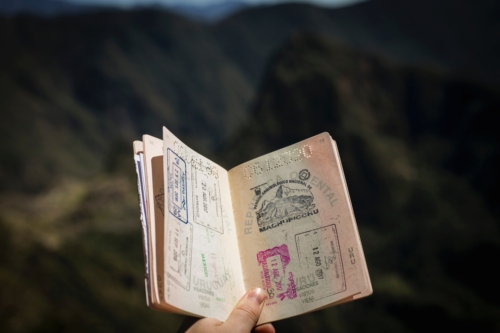
- VISAS
It’s important once you decide on the country you plan to visit to know whether you will need a visa to enter the country. Usually, there are different types of visas: tourist, business, student and exchange to name a few. If you’re simply going for vacation then most people just need a tourist visa. Some visas you can get upon arrival at the airport and some visas you will need to get in advance. You want to make sure you give yourself enough time to get the visa if there are other requirements involved and/or it requires you to send your visa to a foreign embassy. If you don’t, you will end up paying expedite fees on top of the visa fee itself (which varies from country to country) to get it back on time before your trip. There are tons of agencies that can assist with helping you acquire your visa since many people don’t live near embassies where you could schedule an appointment to take care of the visa in person. If you Google “visa agency” a ton of agencies will come up and then you can research and decide which one fits your needs.
To give you an example, when I decided to use a layover and spend a couple days in Moscow, a visa was required. In order to apply for the visa, a ticket that showed when we would be leaving was required, paperwork showing that we’d signed up with an authorized tour company and hotel accommodations were required. In addition, we had to supply another passport-sized photo. We used an agency to expedite our visas because the regular turnaround time wasn’t conducive to when we were traveling.
Here is the link that will tell you whether a visa is required to visit a country. When you open the link, there is an area on the far left side of the page that says: Learn about your destination. In the search box below it, put in the country you’re planning to visit and it will give you information about whether a visa is required along with a lot of other very useful information.

- TRAVEL PROGRAMS
Consider joining programs that will make your travel experience better, smoother, safer and faster. Here are some of the known programs for you to check out:
TSA PreCheck – Allows you to speed through the security lines at the airport where you won’t have to remove laptops, liquids, your shoes, belts or jacket. The cost for membership is $85 and it’s good for 5 years. (works in US only)
Trusted Traveler Programs:
If you’re someone that travels internationally a lot or you plan to, consider joining one of these programs.
Global Entry – This program will expedite your entry when you return to the U.S. so you don’t have to wait in those long customs lines. The other great thing is that it includes TSA PreCheck so you don’t have to apply for this separately. You also have access to expedited entry benefits in other countries. You can apply at the airport. You will be put through a background check and have to do an in-person interview to be approved. The cost is $100.
NEXUS – This program will expedite your entry into the U.S. and Canada via designated NEXUS land, air and marine ports of entry. The cost is $50.
SENTRI – This program will reduce your wait times at designated ports of entry: dedicated processing lanes at southern land border crossings (i.e. Mexico); using NEXUS lane when entering U.S. from Canada by land; and use of Global Entry kiosks when entering the U.S. by air. The cost is $122.25.
CLEAR – If you already have TSAPreCheck & Global entry, this allows you to speed things up even further by using your eyes or fingerprints to get through the line even faster. The cost is $15 a month (billed annually.)
Other Helpful Travel Programs
STEP (Smart Traveler Enrollment Program) – Free service that allows you to enroll your trip with the nearest US Embassy or Consulate. This way you receive important information from the Embassy or Consulate about safety conditions of that country. Enrolling in this program also helps the embassy or consulate contact you in the case of an family emergency, civil unrest or natural disaster.
CPIAP (Children’s Passport Issuance Alert Program) – allows the Department of State’s Office of Children’s Issues to contact the enrolling parent(s) or legal guardians(s) to verify whether the parental consent requirement for minor passport issuance has been met when a passport application has been submitted for an enrolled child.

- VACCINATIONS & IMMUNIZATIONS
Before you begin traveling another thing that you’ll want to consider is whether you’re up to date on certain vaccinations and/or immunizations: MMR, Tetanus, Polio, etc. Then there are other vaccinations and immunizations you’ll want to have as a preventative measure. Some countries require proof of certain immunizations when entering the country. This is necessary if it’s a high-risk area for certain diseases. An example of this is yellow fever, which is a mosquito-borne viral disease, so if you’re traveling to countries in South America or Africa, this may be a vaccine you want to get whether it’s required by that country or not.
You’ll need to check and learn how far in advance before your travels a certain vaccination or immunization is suggested. Some of can days or months to be effective so make sure you’re allowing enough time when scheduling appointments.
It’s important to carry a copy of your shot or vaccination records or certificates with you in case proof is required.
Besides vaccinations and immunizations make sure to consider if you will need any travel medications such as: malaria medication, motion sickness medication, traveler’s diarrhea medication or altitude sickness medication.
If you’re traveling to multiple countries during your trip, you could arrive at your first destination and do your vaccinations there. I mention this because many travel vaccinations are not usually covered by insurance so you’ll pay out of pocket. In the U.S. many of these vaccinations are very costly, sometimes as much as hundreds of dollars. If you wait to get necessary vaccinations once you arrive in the first foreign country you’re visiting, you can save money on the vaccinations because they are usually cheaper overseas.
If you want to get your vaccinations before leaving the U.S., I suggest Passport Health. I used this organization to take care of all of my vaccinations/immunizations and get any necessary travel medications such as malaria pills. They have clinics nationwide and usually have all necessary vaccinations/immunizations and travel medications you need.
The same link provided in the Visa section of this post will also help you determine if any vaccinations are required before visiting a country. When you open the link, there is an area on the far left side of the page that says: Learn about your destination. In the search box below it, put in the country you’re planning to visit and it will give you information about whether any vaccinations or immunizations are required along with a lot of other very useful information.

- FLIGHTS
International flights don’t have to be expensive if you use the right websites and book enough in advance to get a good deal. Also, if you have some flexibility when traveling, you can also save yourself some money. Here are some tips to use when searching for flights:
- Search for flights at least 1-4 months out. This is normally when you’ll see the best prices for tickets.
- Set up fare alerts if you have months before you’re scheduled trip. This will allow you to receive notifications when deals become available.
- Use better travel search engines: Skyscanner, Google Flights, etc. I provide more of these search engines in my Travel Resources Guide.
- Don’t be afraid to use budget airlines. This is another great way to save on travel. Trip Savvy has a very up-to-date list of budget airlines from all over the world.
- If you can fly during the week, you can usually find cheaper rates during the week than on flying on a Friday, Saturday or Sunday.
- ACCOMMODATIONS
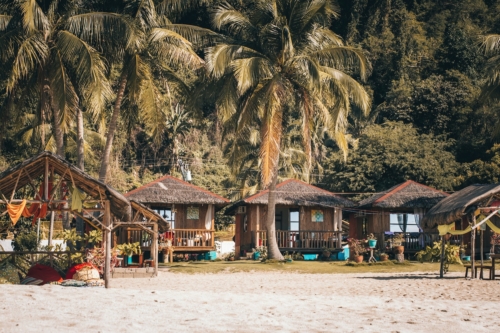
Once you’ve decided on where you want to go, now is the time to start deciding where you want to stay. Depending on how long you plan to travel, hotels can get a bit pricey once you start adding on all the taxes and fees.
Part of choosing your accommodations is deciding what kind of experience do you want to have on your trip. If a nice hotel stay with maid service everyday and room service is what you’re looking for then use sites like: booking.com, Agoda or hotels.com to find a good deal on a hotel room. If you want to experience things like a local or maybe you just want to feel like you’re at home while you’re traveling you might choose staying in a private residence: house, apartment, villa. Sites like AirBnB and HomeAway will help you find what you’re looking for. Maybe you want to keep it cheap or share space with other people so you make new friends. Hostels, couchsurfing or renting a room in someone’s private residence might be for you.
Even if you’re looking for something completely out of the norm like a castle, tree house, houseboat, barn or yurt, you can find the right accommodation on any of the sites I’ve mentioned.
When booking your accommodations just make sure you’re taking into account if you’re booking in a peak season where accommodations go quickly or the price may be higher. Other things to consider is if there is a big event or multiple events that would make accommodation scarce at that time so that you book in advance to avoid getting stuck with less desirable locations or pricier locations.
7. PACKING
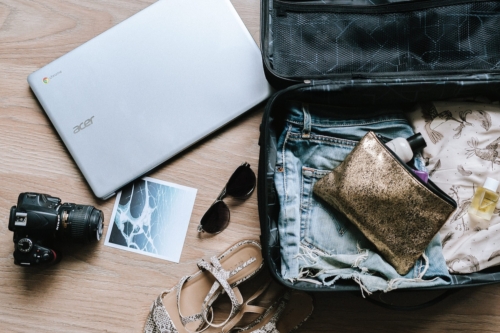
Checking weather for your destination is important so you know what to pack. Just because it’s summer where you live doesn’t mean it’s summer all over the world at that time of year so it’s important to know if you’re headed to a destination during their rainy season, hot and dry season or winter season, etc. Besides knowing the right clothing to pack you’ll want to check and see if you’ll need things like converters so you can plug in your computer or hair dryer while you’re away. I offer a comprehensive packing checklist and outfit planner when you subscribe that will help ensure smart packing and not overpacking, along with helping make sure you don’t forget anything.
Whether you’re going for a few days, weeks or months you need to decide what kind of person you are when it comes to luggage: carry-on, backpacker or check it person. I know people that can survive for months of travel at a time with a carry-on and other people that can make it three days without having everything in a checked bag. The right luggage and accessories are essential to a good trip. When making your luggage choice just remember that most airlines these days have baggage fees, especially if you’re flying domestic. For international travel most fees are waived, but you’ll want to check with the airline to know for sure. Knowing you’ll have these fees may influence your luggage decision. If you’re traveling with family or close friends you might consider sharing a suitcase to save on fees.

8. LEARN THE LANGUAGE
I’m not saying you need to become fluent in the language before you visit, but it helps to learn a few of the words and phrases that will help you out; such as, ‘Hello’, ‘Good morning’, ‘Where do I catch the train or bus?’, ‘Where’s the bathroom?’, etc. Plus, the locals will appreciate that you’re trying. Here are a few apps or sites that I’ve found useful:

- CULTURAL NORMS
Learn some cultural norms/ do’s and don’ts so you’re not the ugly Americans. Remember you’re in someone else’s country so take a second to learn things that may help you when interacting with locals. Where something might be okay to see, do or talk about, doesn’t mean it’s this way all over the world. In some countries tipping is frowned upon. You won’t know this unless you learn a little about where you’re going.
For instance, in Japan, you should never stick your chopsticks vertically in your bowl. It’s said to bring bad luck and at Japanese funerals a bowl of rice is displayed with chopsticks sticking vertically from the center. In Iceland, you should not bring up politics. In Brazil, the “ok” hand sign or gesture is considered extremely rude. When in doubt, I would highly suggest not using too many hand gestures while traveling so that you don’t offend anyone.
To avoid committing any social faux pas, knowing and understanding the cultural norms of a country can be very helpful.
You’ll find some great information either in books or in online cultural guides that can help you out.
![]()
10. RESEARCH
Research of the city and country you plan to visit is key to avoiding any unpleasant surprises. For instance, is a main or key attraction undergoing any renovations or will be closed when you plan to visit. I’ve experienced this before and it can be very disappointing. Research is important so you know what kind of weather/climate you can expect so you can not only pack accordingly, but plan the appropriate activities for that climate.
Research the neighborhoods in the city before you book your accommodations so you know whether the neighborhood is near or far from the landmarks and/or attractions you want to see. There is nothing worse than realizing after the fact that you booked an accommodation that is nearly an hour away from anything. So while you may be getting a good deal on your accommodation, you’re now spending a lot of time and money on transportation getting to and from where you want to go.
Also, if you’re going to a destination in an off-peak season will the business hours remain the same or do shops and attractions start to close earlier? Learning more about the destination lets you find out if there are days where museums are closed or if museums are free.
Read reviews whenever possible. People will often share detailed information that can be helpful, whether it’s about a hotel, AirBnb, attraction, activity, etc. Lonely Planet website, app and guidebooks are also another great resource to help in your research.
The key is research so you don’t have any big surprises. You’re spending your hard earned money so ensure you have a good trip by educating yourself on what to expect.
- CELL PHONE/ DATA PLANS
In this day and age of amazing technology that consists of some pretty incredible smart phones and tablets that we can’t live without, you’ll want to check your cellular and data provider to find out what international plans they have available. This information will include how much it is per minute if you make calls with your cell phone and whether you have any data while traveling or if they will charge you to use this while you travel. You’ll also want to find out how to turn off data roaming or anything else that could result in an astronomical bill.
Each provider has their own variation of what you get with an international plan. I encourage you to call and speak with a representative so you understand all the details of an international plan and any and all fees that go along with it. Having traveled internationally with both a T-Mobile Plan and Verizon, I can tell you that both have great, affordable plans that allow you to use your phone while you’re out seeing the world.
One of the other options you have is to purchase an unlocked phone that will allow you to use a local SIM card.
If you’re only going to be away for a small amount of time and/or you don’t travel very often you may consider just using the time to take a cell phone break and leave your phone shut off at your hotel. Some of you are probably laughing or gasping in shock right now. I get it. I’m just as tied to my phone as the next person. I just wanted to offer it up as a suggestion.

- CURRENCY EXCHANGE
It’s important to know the currency exchange between your currency and the country you’ll be visiting. There are tons of currency converter sites and apps that will give you accurate currency exchange information. This becomes very important if you have a fixed amount or budget you’re working with because if the country your visiting has a currency with a higher value you’ll want to be careful on how much you’re spending versus visiting a country where the exchange rate is lower and your money will stretch further. For example, the exchange rate (as of the date of this article) of a U.S. dollar to a Euro is $1 USD = $0.8773 Euros.
You can choose to find a currency exchange location in your hometown prior to your trip if you want to have some money ready before arriving to your destination. If you make this choice, be sure to allow at least a week or some before you leave to order the currency you need. Some currency exchanges may not keep the currency you need readily available and may have to order it.
Most airports have currency exchange counters whether you choose to exchange your funds before you board your flight or once you arrive. Once you’re on the ground in your destination location you’ll either be able to visit a local or partner bank (if your bank back home has international partners) or local currency exchange locations. The other option if ATM’s are widely available is to just pull out cash in the local currency as needed. Always make sure wherever you choose to exchange currency is a reputable place so you don’t get scammed. Again, you’ll want to do your research here because each place you will pay a fee to exchange your currency, so you’ll want to find the location with the best exchange rate and/or the lower fee.
Another important thing to note is to check and see if the country you’re visiting is mostly operated by cash or if you’ll be able to use your debit or credit card while you’re there. Many merchants or vendors while I was visiting Taiwan would only allow you to pay using cash. Those trips to the ATM can get costly if you’re paying a fee to that bank to draw out cash and your bank is also charging you a fee on their end. Even if you can use your debit or credit card overseas, what fees are you incurring? This is not information you want to find out about after the fact. Educate yourself before swiping your card repeatedly.

- PRE-BOOK EXCURSIONS AND ACTIVITIES
I’m more of a planner when it comes to travel. One of the things I think is very helpful when traveling is to pre-book some of the activities you plan to do. This way you avoid arriving and learning that the tour you wanted is completely booked or sold-out. Sometimes you even get better deals when you pre-book. There are so many sites that you can choose from when purchasing tickets or packages in advance. Trip Advisor is a great resource when you want to find out about companies and read other people’s reviews about their experiences.
Besides being a planner, one reason I like booking in advance is because I can search around and see if there are activities or attractions I haven’t considered or may be unaware of. Another reason is while there may be a lot of companies that offer very similar tours I usually research to find the tour that’s slightly unique or different. Maybe the tour offers entrance to a part of the attraction you’re visiting that’s usually closed to visitors. For example, I booked a tour to see Stonehenge when I visited England and because I did research and booked in advance I found a company that would allow us to be up close and personal with the stones, not stuck behind the chain link rope, nearly fifty feet away from the stones. When I visited the Colosseum in Rome, I pre-booked tickets with a company that gave us access to the underground area and the arena floor. A final example was taking a tour that provided access to the original Bramante Staircase in the Vatican Museum. I would probably wouldn’t have known or gotten access to the tours if I had not booked in advance.
Pre-booking just allows you to worry less while traveling because it’s already taken care of: it’s been paid for and you usually have any details you need about what to expect. All you have to do is show up.
Google is your friend when it comes to searching for places to find tickets to attractions and activities, but here are a few sites to help you get started: Viator and Get Your Guide.
![]()
14. TRIP/TRAVEL/HEALTH INSURANCE
Many people will often pass up trip or travel insurance, which I think can often be a mistake since no one knows the future. Some people might even tell themselves that they’ve traveled or gone places before without any accidents happening, but all it takes is that one time when something does go wrong to not only ruin your trip, but also put you out of hundreds or thousands of dollars if you’re unable to complete your trip. Years ago, after completing law school and sitting for the bar my sister decided to treat herself to an international vacation. Four days into a twenty-four day European tour she broke her arm and had to go home. If she had not bought trip insurance she would have lost a lot of money. Instead she was able to get the remaining cost of the trip refunded.
Maybe you don’t accidentally break a body part, but what if in the midst of your travels you get bad news from back home and need to cut your trip short? This is another reason that travel insurance can be valuable because it can help get you home without you having to come out of pocket for a new, last-minute ticket.
Another thing that is important is to check if a country requires you to show proof of health insurance when you visit. Not everyone’s U.S. health insurance will cover you when you travel overseas. For instance, Cuba requires health insurance upon entry for U.S. citizens visiting the country. If you book with American Airlines or JetBlue the health insurance is built into your ticket. This is not always the case for other countries so this is another area where travel insurance becomes necessary because you can ask for part of your coverage to be health insurance.
If you’re someone who enjoys adventure sports or things that add a bit more danger some companies also offer specific coverage on certain activities.
Just know that all trip/travel insurance is not created equal. Many airlines will often offer this, but you really don’t know what kind of coverage you’re getting. Do yourself a favor and do the research and purchase your own travel insurance so you know exactly what you’re getting. I have used and really like World Nomads travel insurance. There are also other great companies out there. Just do your research and find the right company for you.
- AIRPORT
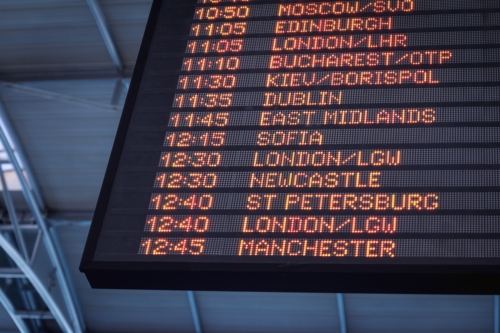
When traveling internationally, typically you need to arrive to the airport at least 4 hours before your flight. Between getting through the checkout/baggage lanes, security and customs lines you’ll be thankful you listened to this piece of advice so you don’t have to rush to try and catch your flight. If you’re traveling during peak seasons or holidays you’ll definitely want to make sure to adhere to this piece of information. It can mean the difference between enjoying your trip or having to spend extra money because you missed your flight.
Whether you purchase TSA PreCheck or Global Entry as I mentioned earlier, please remember that when going through security, especially if you have a carry-on that contains your toiletry items that the liquid items are limited to a certain size. Anything that is a cream, liquid or gel cannot be in a container larger than 3.4oz.
Since you will arrive early, I suggest accessing one of the many airport lounges that are available. These days you don’t necessarily have to be a first-class or business class passenger to access them. Often you can pay a nominal fee and gain access. The chairs are usually way more comfortable, there is usually free snacks, meals and/or beverages, free WiFi, private bathrooms and sometimes showers. A program called Priority Pass allows you access to 1200+ lounges worldwide. The standard membership is $99 annually and you pay $32 per visit and the guest price is the same. From there the membership levels increase, but then your visits to the lounges are free. Certain credit cards and financial institutions have Priority Pass as a benefit, so you may want to double check before you purchase.
Another great resource for getting information on airports is a website called Sleeping In Airports. It gives you information on lounges, how to sleep in an airport if you have a long layover or delayed flight, airport hotels. It’s really a great tool in helping navigate the airport.
- TRAVEL APPS
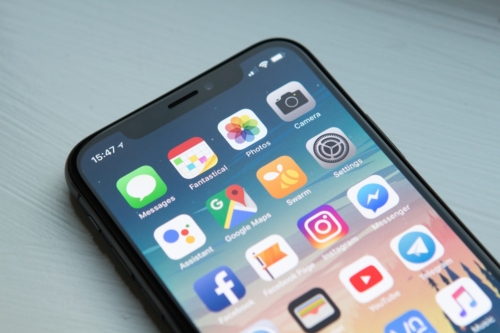
Apps are your friend when it comes to traveling. Some apps you’ve already seen me mention in other parts of this article. In this section I want to share with you a few of the apps I never travel without:
TripIt – This is a great travel planning app that will keep the itinerary and details of your trip so everything is all in one place.
Google Translate – I do not know how to speak a foreign language so if I find myself in a situation where I need to translate this app has been a lifesaver in trying to communicate.
WhatsApp – This messaging app allows you to keep in touch with family and friends back home and it costs you nothing. It uses your phones Internet connection (4G/3G/2G/EDGE or WiFi) to let you call or message.
Uber or local rideshare app – When I travel I almost exclusively use Uber or a local rideshare if I don’t walk or use local buses or trains because it’s a very inexpensive way to get around.
Cash or Paypal – In the event you need to send or receive money, these are my go to money transfer apps.
Skyscanner – This is by far one of my favorite travel search engines. I keep the app on my phone so I can easily search for flights.
Currency converter apps (such as XE Currency Converter & Exchange Rate Calculator or Easy Currency Converter App) – This is a helpful app to have because you’ll always be able to calculate a conversion on the spot if you’re unsure or want to know what you’re spending.
CityMaps2Go – This app provides offline maps of cities so you don’t need WiFi or data to access them. While you’re out exploring you’ll have the city map at your fingertips.
These are just a few of the travel apps I consider lifesavers. Stay tuned for a longer blog post that will share more great travel apps.

- GROUND TRANSPORTATION
Once you arrive to your destination, how are you planning to get around? You may choose to use a combination of ground transportation, but knowing in advance will prove to be helpful.
Renting a car in another country may not be the easiest thing. It’s important to research what kinds of documents are required, along with any fees you’ll be responsible for. You’ll want to check and see if the country you’re visiting drives on the side of the road you’re used to so you’re prepared for the change. Another factor to consider is the cost of gas. While the rental itself may not be terribly expensive, how much is their gas per gallon? This may really affect your budget if you plan to hit the road quite a bit.
Many international cities have great infrastructure when it comes to ground transportation so taking the local bus, train or metro is a great way to get where you need to go at a minimal costs. Do your research to know if this is a viable option where you’re heading.
One of my favorite modes of ground transportation no matter where I travel is Uber or a local rideshare company. It’s less expensive than a taxi. Download the app. Plug in the address you need to be picked up from and the location of where you’re headed and it will let you know the name of the driver, make and model of the car, license plate of the person who is headed to pick you up. You can get your first ride with Uber for free.
Of course you can always use a taxi if you need or want to, just make sure you know which taxi companies or drivers won’t scam you. I’ve traveled to many countries and often get warned about using certain taxis in cities. Have an idea of what the rate should be and don’t be afraid to ask the driver how much they would charge to get you where you want to go before you get in the car.
If you’re in a walking city, I highly encourage you to get out and use your legs. You experience the city in a different way when you walk. Plus, it’s free.

- TIPPING
If tipping is expected in the country you’re visiting it’s important to make sure you factor this into your budget. I can’t tell you how many times I’ve talked to people on their trip and one of the surprise expenses they hadn’t accounted for was how much they spent in tips. Even if you do a free walking tour there is the expectation that you’ll tip the tour guide because that’s how they make their money. Besides tour guides, other people you can expect to tip will be drivers (taxis, tour drivers, etc.), waiters, bellhops, any service provider such as masseuse or someone else that provides a spa or salon service. Depending on how long you’ll be away and how many meals or tours you go on, tips can start to add up pretty quickly. Make sure you’re taking this into account if you’re budgeting for your vacation.

Now that these tips have helped you plan the perfect international trip, the important thing is to relax and enjoy your trip. Don’t be afraid to meet new people, try new foods and learn new things. This trip is going to be unforgettable. Just remember, that sometimes despite all your planning, unexpected things happen, that’s just life, but these tips will help ensure that if an incident does occur on your trip it won’t be due to poor planning on your part.
——-
*The information contained in some sections of this post only pertain to U.S. citizens. If you’re from another country you will need to check with your government’s or country website on the correct process for applying for a passport, obtaining visas to travel abroad, vaccinations, etc.
**Disclaimer: In the name of full transparency, please be aware that this blog post contains affiliate links. I earn a small commission that helps fund my movie-going habit if you use these links to make a purchase. You will not be charged extra and you’ll help support my need to see movies during their first run. Movie tickets can be pricey these days so you’re doing me a huge favor. Thank you!


